
Introduction
Assets are the machines equipped with one or multiple Treon Connect sensors.
Assets can be machines, sections of equipment, or part of a process. They are the basis for viewing machine health.
This article explains how to edit Asset details and how to attach new Devices to existing Assets in Treon Connect Web.
Video: Edit Asset details
00:00: This video tutorial explains step by step how to edit the details of an Assets in Treon Connect Web.
00:07: This demo highlights how you can edit asset information and attach devices to maintain accurate records.
00:13: Log in to Treon Connect Web and select "Assets."
00:17: Select the Conveyor category to focus on assets related to conveyor systems.
00:23: Select the Asset you would like to edit. Click the Asset's name in the list.
00:28: A new window opens with the details of the selected Asset.
00:33: On the left side you can see the Asset information with the description, the Asset type, the Group the Asset belongs to and the location description of the Asset.
00:44: On the right side you can see all sensor devices attached to the selected Asset.
00:50: There can be none, one or multiple Devices attached to an Asset.
00:55: In order to edit the details of the Asset, click "EDIT" n the top right corner.
01:02: You can now edit the details of the Asset.
01:06: You can also remove the image and upload a new image.
01:12: You can attach a file in PDF format to the Asset.
01:16: Click SAVE CHANGES to apply the updates to the Asset information.
01:21: You are now back in the Asset list menu.
01:25: Click CLOSE to to return to the main Treon Connect dashboard.
01:30: This video tutorial showcased how to edit asset details in Treon Connect, helping you maintain accurate and organized asset records.
Step-by-step: Edit Asset details
Step 1: Access Treon Connect Web and Assets
For accessing the Assets management, open your Treon Connect Web application.
Click the Assets button in the Treon Connect Web main menu.
Step 2: Asset list
Here you can see a list of all current Assets.
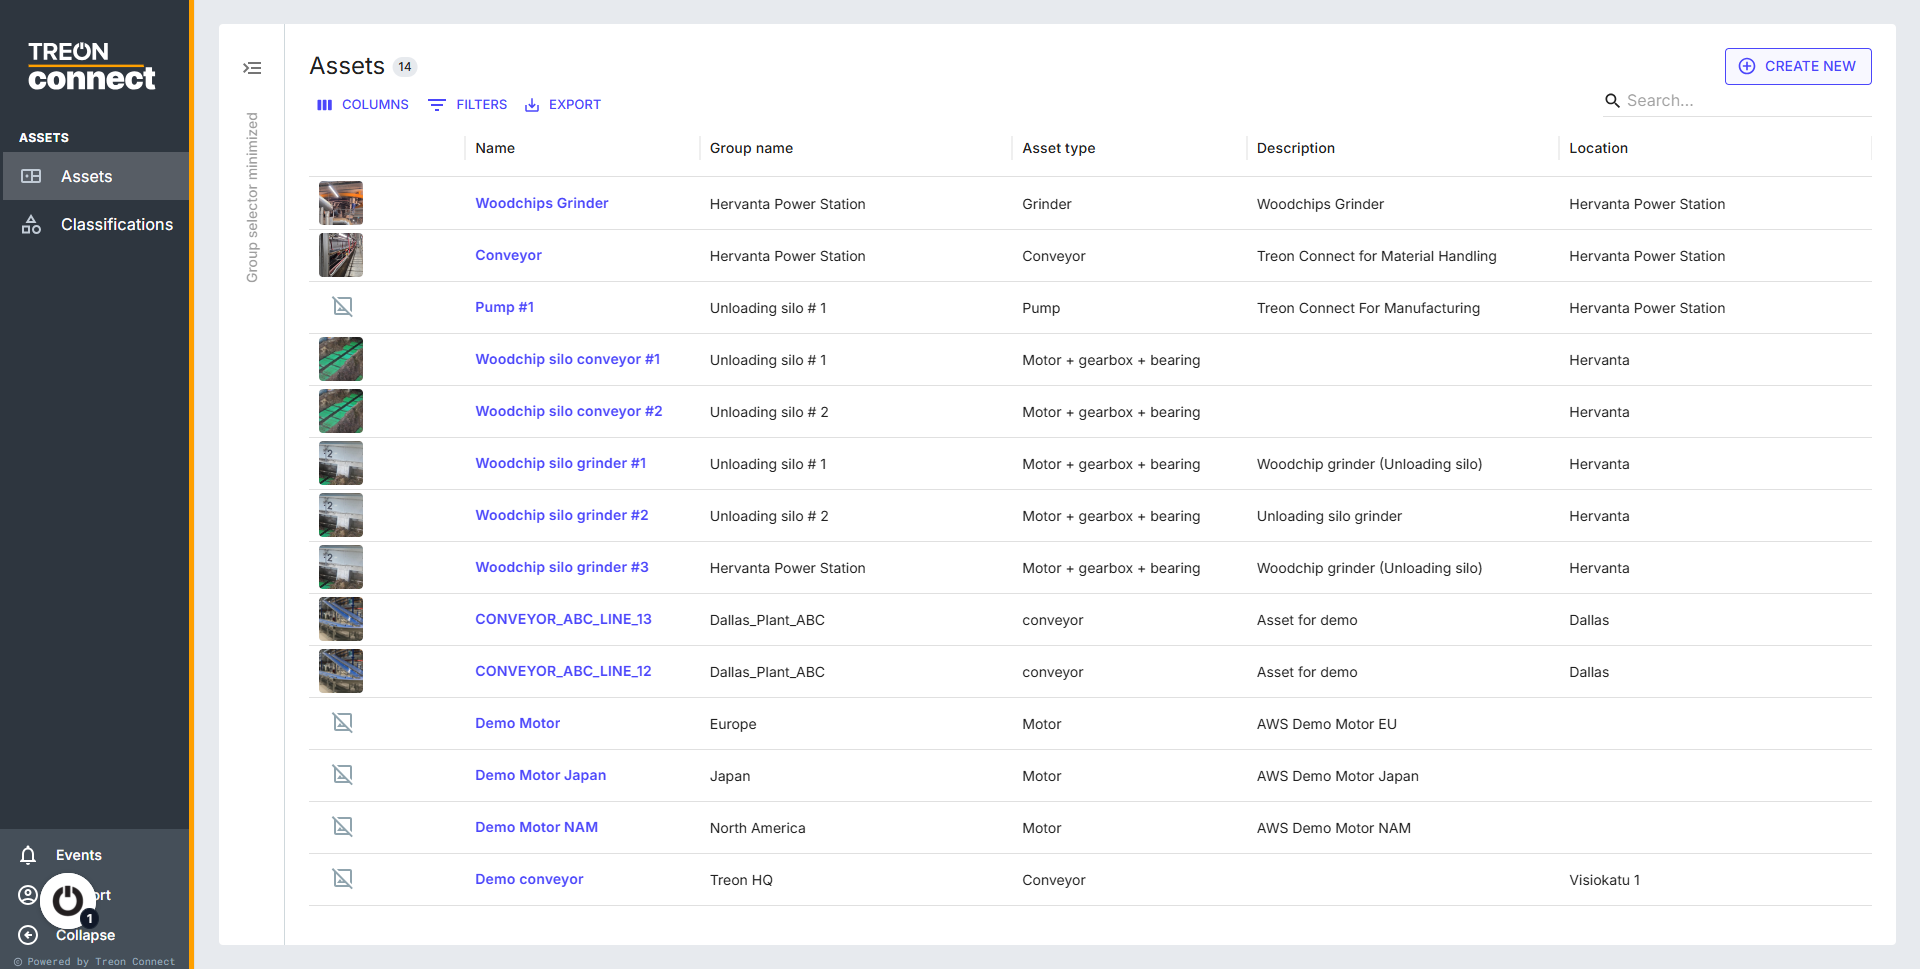
Step 3: Select Asset
Select the Asset you would like to edit. Click the Asset’s name in the list.
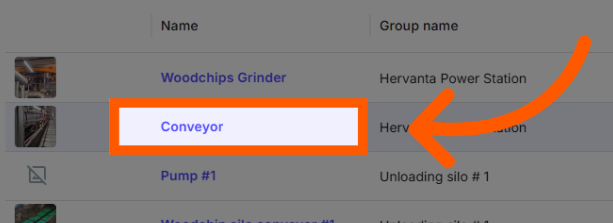
Step 4: Asset details
A new window with all details of the selected Asset opens.

Step 5: Examine Asset details
Now you see the current Asset details on the left side:
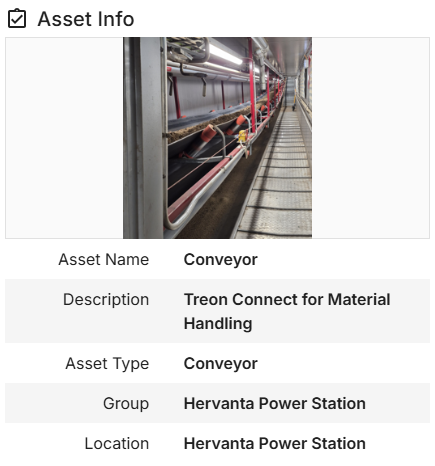
Step 6: Edit the Asset
In order to edit the details of the Asset, click “EDIT” in the top right corner.
A new window opens to edit the details of the Asset.
You can also remove the image and upload a new image.
You can attach a file in PDF format to the Asset.
Step 7: Save Changes
Once you have finished editing the Asset, click SAVE CHANGES to apply the updates to the Asset information.
You have now successfully edited the Asset!
Video: Attach Devices to existing Assets
00:00: This video tutorial explains step by step how to edit the details of an Assets in Treon Connect Web.
00:07: This demo highlights. How you can edit asset information and attach devices to maintain accurate records.
00:13: Log in to Treon Connect Web and select "Assets."
00:17: Select the conveyor category to focus on assets related to Conveyor Systems.
00:23: Select the Asset you would like to edit. Click the Asset's name in the list.
00:29: A new window opens with the details of the selected Asset.
00:33: On the left side you can see the Asset information with the description, the Asset type, the Group the Asset belongs to and the location description of the Asset.
00:43: On the right side you can see all sensor devices attached to the selected Asset.
00:48: There can be none, one or multiple Devices attached to an Asset.
00:53: In order to edit the details of the Asset, click "EDIT" n the top right corner.
00:59: You can now edit the details of the Asset.
01:02: You can also remove the image and upload a new image.
01:07: You can attach a file in PDF format to the Asset.
01:11: Click Save Changes to apply the updates made to the Asset information.
01:17: Click edit attached to manage devices. Currently linked to the asset.
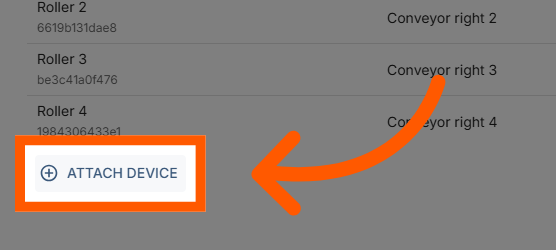
01:21: Click attach device to add a new device to the asset for better tracking.
01:27: Click attach device again to confirm and finalize the device Edition.
01:32: Click done to finish, attaching devices, and return to the asset overview.
01:37: Click close to exit the acid editing interface and return to the main dashboard.
01:43: This demo. Showcased how to efficiently edit asset details and attached devices within tree and connect helping. You maintain accurate and organized acid records.
01:53: Start optimizing your asset management by exploring these features today.
Step-by-step: Attach Devices to existing Assets
Step 1: Access Treon Connect Web and Assets
For accessing the Assets management, open your Treon Connect Web application.
Click the Assets button in the Treon Connect Web main menu.
Step 2: Asset list
Here you can see a list of all current Assets.
Step 3: Select Asset
Select the Asset you would like to edit. Click the Asset’s name in the list.
Step 4: Asset details
A new window with all details of the selected Asset opens.
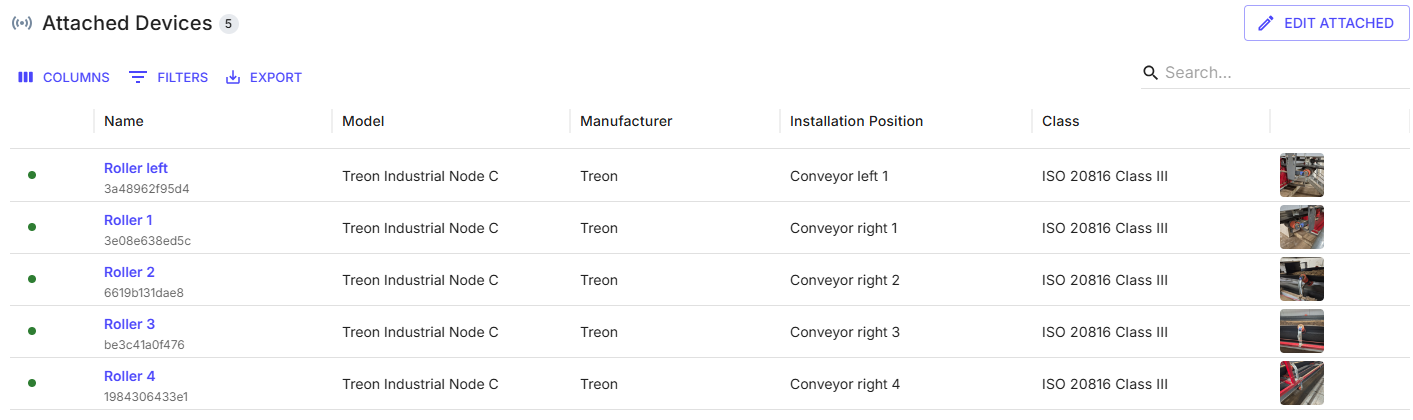
Step 5: Examine attached Devices
Now you see all Devices that are attached to the Asset.
There can be none, one or multiple attached Devices.
Step 6: Attach Device
Click the ATTACH DEVICE button to add a new sensor Device to the Asset.
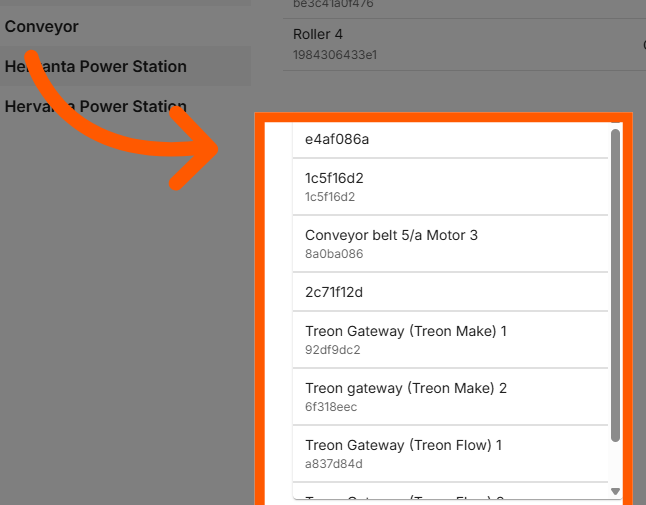
Step 7: Choose Device
From the pull-down menu, choose a Device from the list of available sensor devices.
Step 8: Save Changes
You can attach one or multiple sensors to the Asset.
After you have attached one or multiple new Devices, confirm by clicking DONE in the top-right corner.
You have now successfully attached a new Device to an existing Asset!