Battery change
You replace the battery, not the sensor, which keeps lifecycle costs down. Swap in an original Treon Battery Module B111 or B211 and the node carries on measuring. Battery changes are for instructed persons only.
Instructed persons only
Replacing the Treon Battery Module B111 or B211 with an incorrect type of battery defeats an internal safeguard, renders the node inoperable and voids the product warranty. Only use original Treon Battery Modules, and only let instructed persons carry out the replacement.
When to change it
Your Treon Connect instance sends battery alert events to everyone with access to the asset the node is commissioned to.
You can also check manually: open the node in Devices and read the battery voltage at the top of its telemetry.
What you need
- A new Treon Battery Module B111 or B211 (depending on your Treon Industrial Node X model).
- A new O-ring — supplied with the replacement module.
- A screwdriver. A manual screwdriver is recommended.
- Optionally a 36 mm tool to support the steel base, which helps when the node is mounted.
- Personal protective equipment as per site rules.
Ideally replace the battery in a clean environment. It can be replaced while the node stays mounted on the machine. Order replacement batteries and O-rings from Treon.
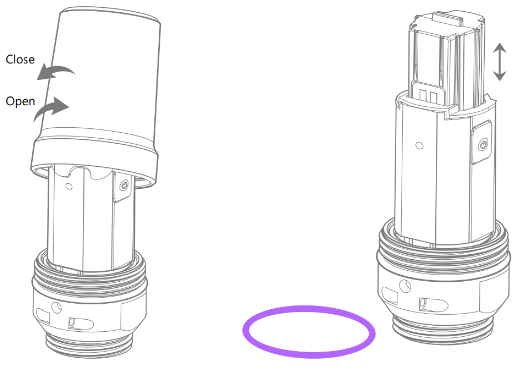
Step by step
- Remove all dirt and dust from the sensor before opening the cover.
-
Turn the safety screw carefully counterclockwise to open it.
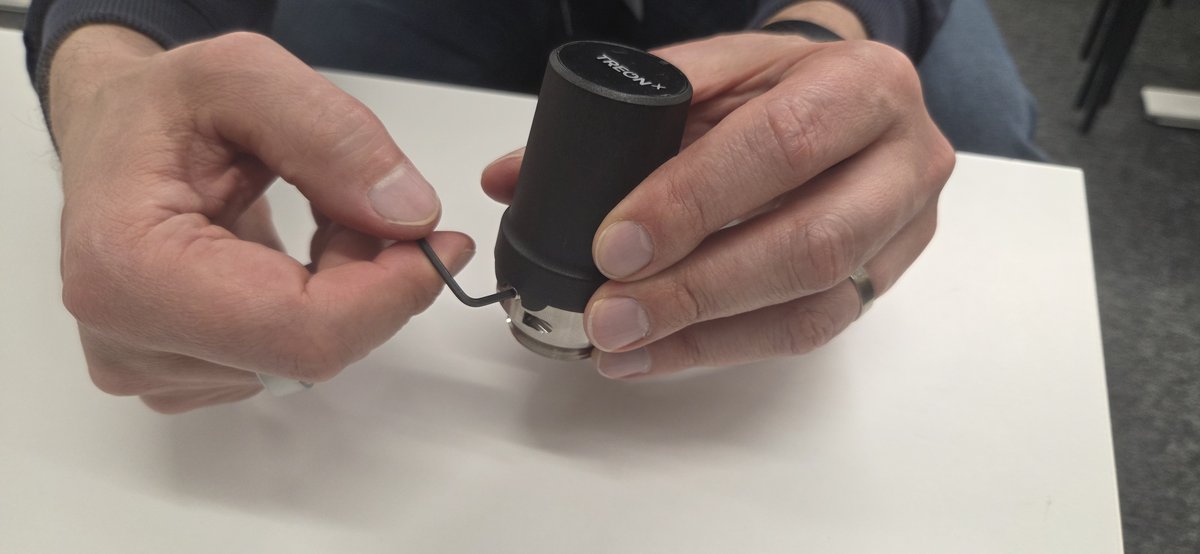
-
Open the plastic top cover by turning it counterclockwise. Support the steel base with a 36 mm tool to stop the base rotating — especially useful when the sensor is mounted.
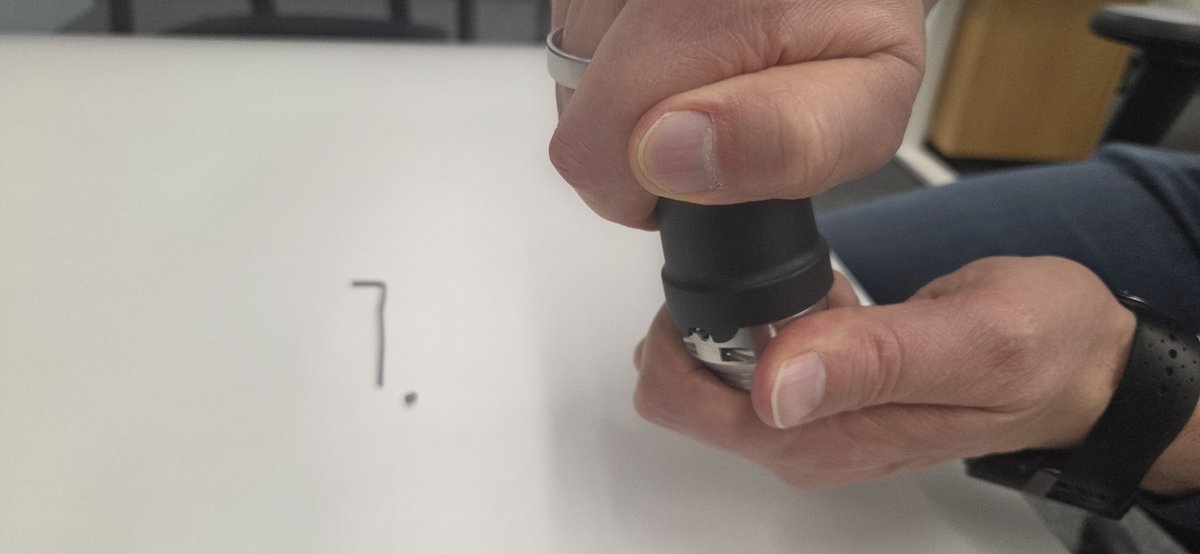
-
Remove the old battery module by lifting it up out of the sensor base.
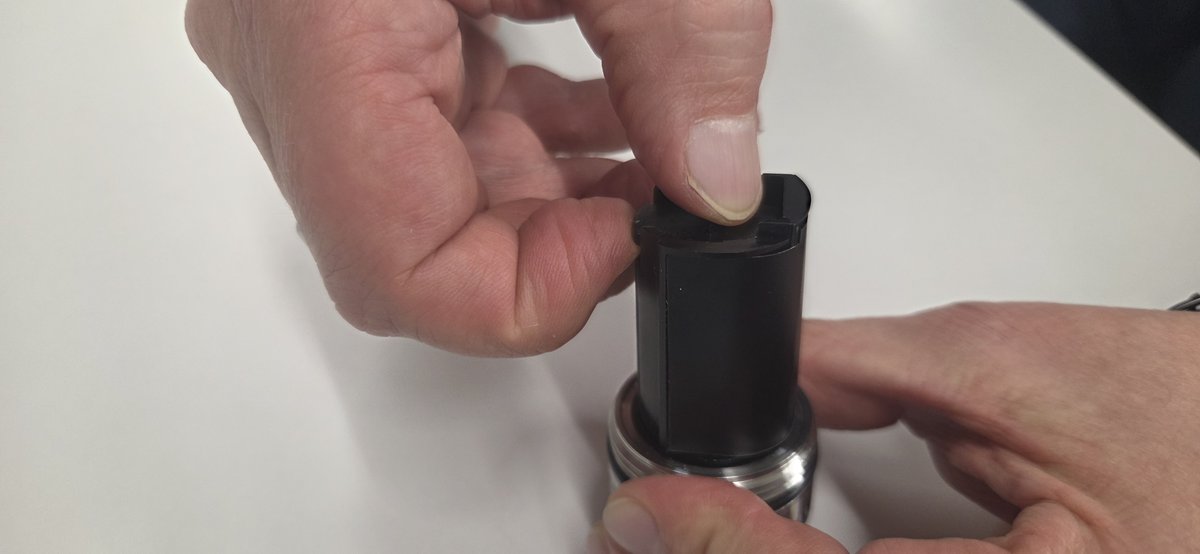
-
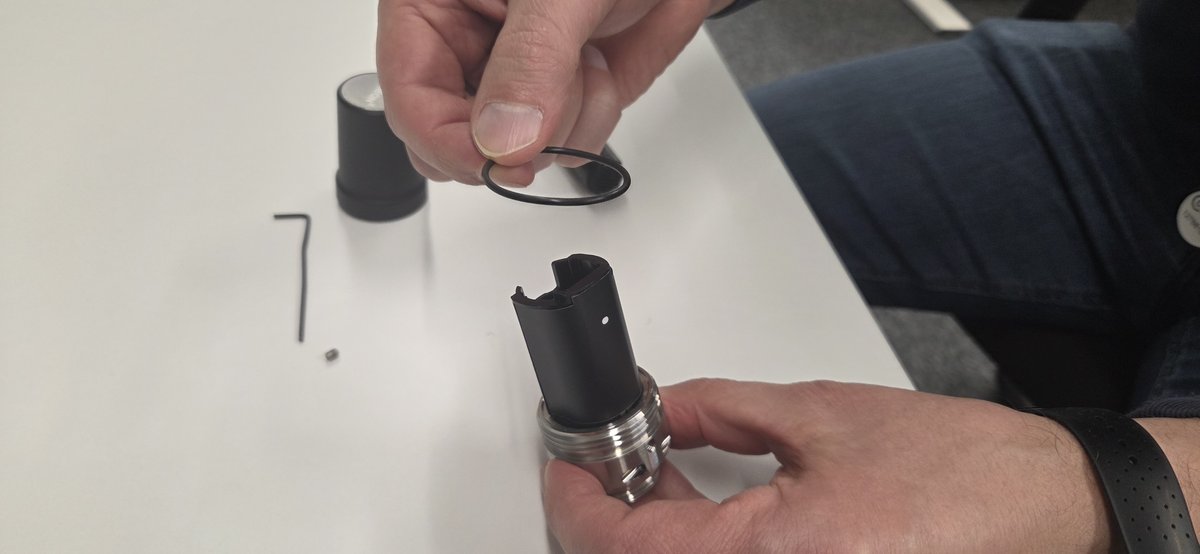
Remove the old O-ring and fit the new one.
-
Place the new Treon Battery Module in the sensor base.
- Close the plastic top cover by turning it clockwise. When fully closed, the small notches at the bottom of the top cover align with the screw opening at the base of the sensor.
- Secure the safety screw. Make sure it is fully tightened so nothing can move or loosen in use.
To switch the node back on, see Powering on.
Troubleshooting
A standard battery won't work. The battery module cannot be replaced with a store-bought battery. Contact Treon for a new module.
The safety screw won't come out. Use the correct screwdriver — a manual one is recommended. The screw should be tightened, not over-tightened, when refitted. If it has been over-tightened or the profile is worn and it will not move, contact Treon Support.
The new O-ring doesn't fit. Use only the original Treon O-ring supplied with the replacement module. It should sit in its space without being stretched.
The casing won't close. Check the battery module is properly seated. With the module in correctly, the cover fits over the base without force.
The safety screw is lost. Do not put the node back into use without the cover secured by the safety screw. Machine vibration can loosen the cover and it can come off, potentially damaging the asset.
The machine can't be stopped. Treon does not recommend changing the battery module while the node is attached to a powered-on, running asset. Removing the cover, changing the module and refitting the cover on a running machine risks damage to the product, damage to the asset, and personal injury.
Disclaimer
Treon is not responsible for any damage, injury, or device malfunction resulting from battery replacement on the Treon Industrial Node X. Battery changes must be performed by qualified personnel using only approved battery types. Any issues caused by improper handling, incorrect procedures, or the use of non-approved batteries are the sole responsibility of the installer or end user.